
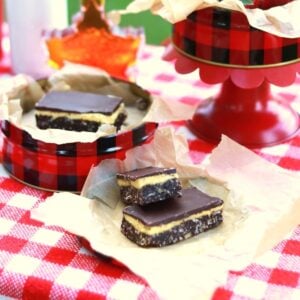
These classic no-bake Canadian Nanaimo Bars are less sweet than the traditional recipe, but just as delicious (you can enjoy more of them with less guilt). A biscuit base of nutty chocolate is topped with a creamy vanilla-butter custard icing and a fudgy chocolate glaze - so good! These squares are the perfect easy dessert for our Canadiana picnic (and easily made gluten-free, too). Join us as we celebrate Canada Day with a fun retro theme - we hope it inspires you to try out our recipes for a similar picnic any time of the year!

Bring out your Canadian flags and celebrate Canada Day (July 1st) with a fun Canadian-themed picnic, or just use this Canadian-inspired menu for a picnic or gathering any time! Canada is a melting pot of many cultures, and the cuisine enjoyed across this vast country (the 2nd-largest in the world) reflects that diversity. Of the foods that are truly Canadian, originating in this country, Nanaimo Bars are a beloved favourite.
These decadent no-bake bars have been a staple at potlucks and picnics, church socials and family gatherings in the prairie communities I grew up in. So when we got together with our picnic partners, Nicoletta and Loreto of SugarLoveSpices, to plan a quintessential Canadian picnic, Nanaimo Bars were our first choice for an easy, packable picnic dessert.
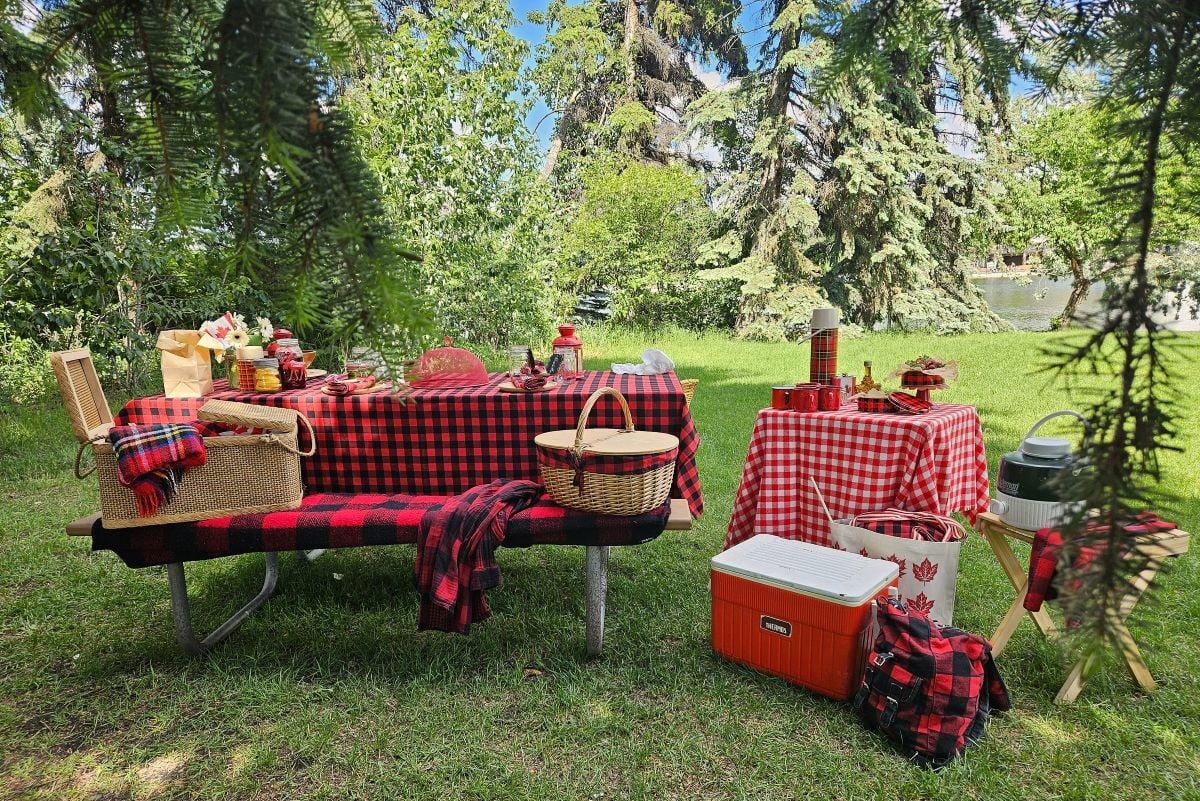
A Canadiana Picnic
This was such a fun picnic! We chose the newly renovated Hawrelak Park in Edmonton on a sunny afternoon and were thrilled to be joined by some truly Canadian wildlife guests during our visit. (I was too slow to snap the curious squirrel who checked us out, too).
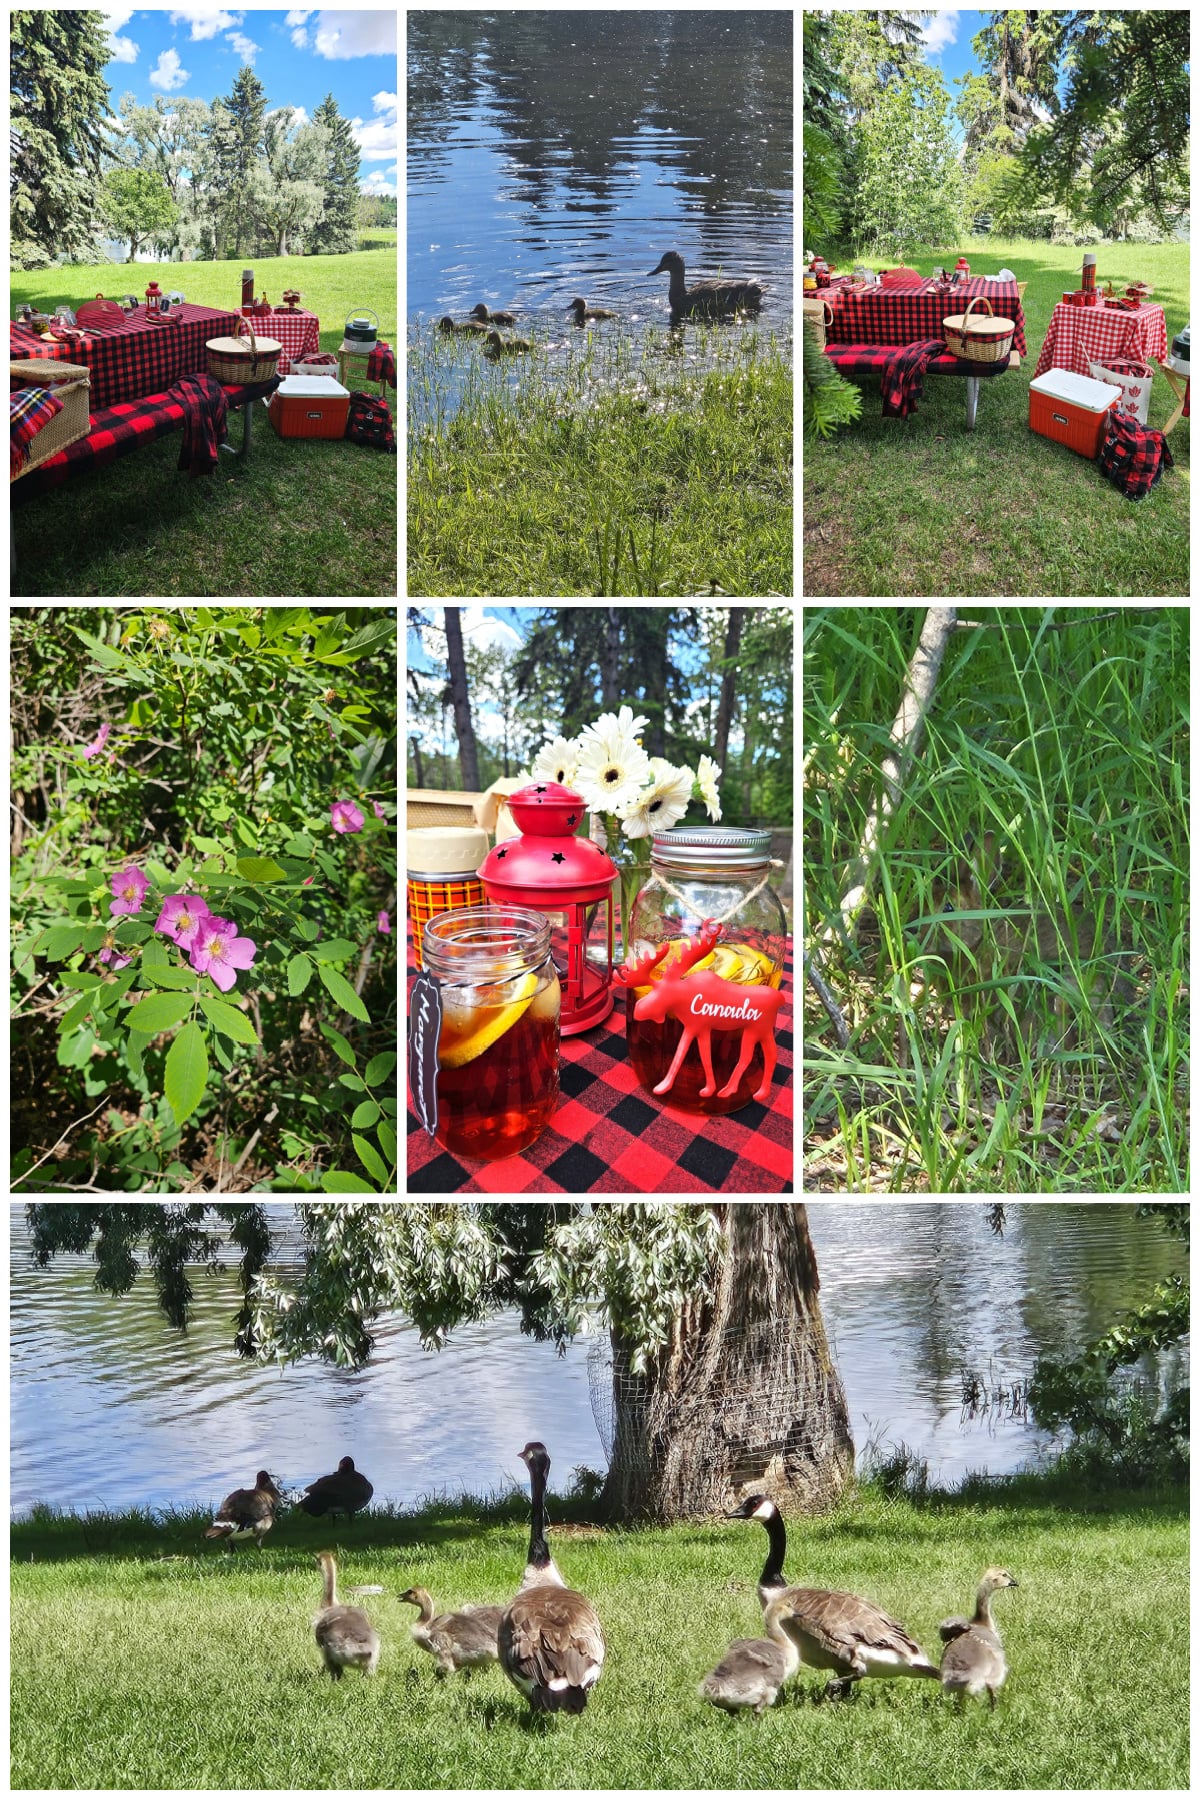
Red & white are the colours of our Canadian flag and the typical colours of a Canada Day celebration, but we thought it would be fun to go a bit more retro. So we chose an early Canadiana theme, using lumberjack plaid linens and blankets, wooden serving pieces, mason jars, red lanterns, and cream-coloured gerbera daisies.
We dug through our closets and found thrifted and saved bits that totally brought out the feel of a vintage Canadian picnic. Our old red and white cooler was great for transporting food, along with a couple of vintage picnic baskets and an antique thermos. A green water jug parked on a wooden fishing stool provided a hand-washing station, and plaid woolen blankets softened the wooden seating of the picnic table.
We chose picnic food that traveled well and represented our Canadian cuisine.
Our Canadiana Picnic Menu
Buttery Popcorn
Salmon and Candied Maple Bacon Sliders
Creamy Coleslaw
Deviled Eggs
Refrigerator Bread & Butter Pickles
Nanaimo Bars, Fresh Strawberries
Iced Tea with Lemon
Canadiana Coffee (hot coffee, cream, maple syrup, Canadian rye whisky)
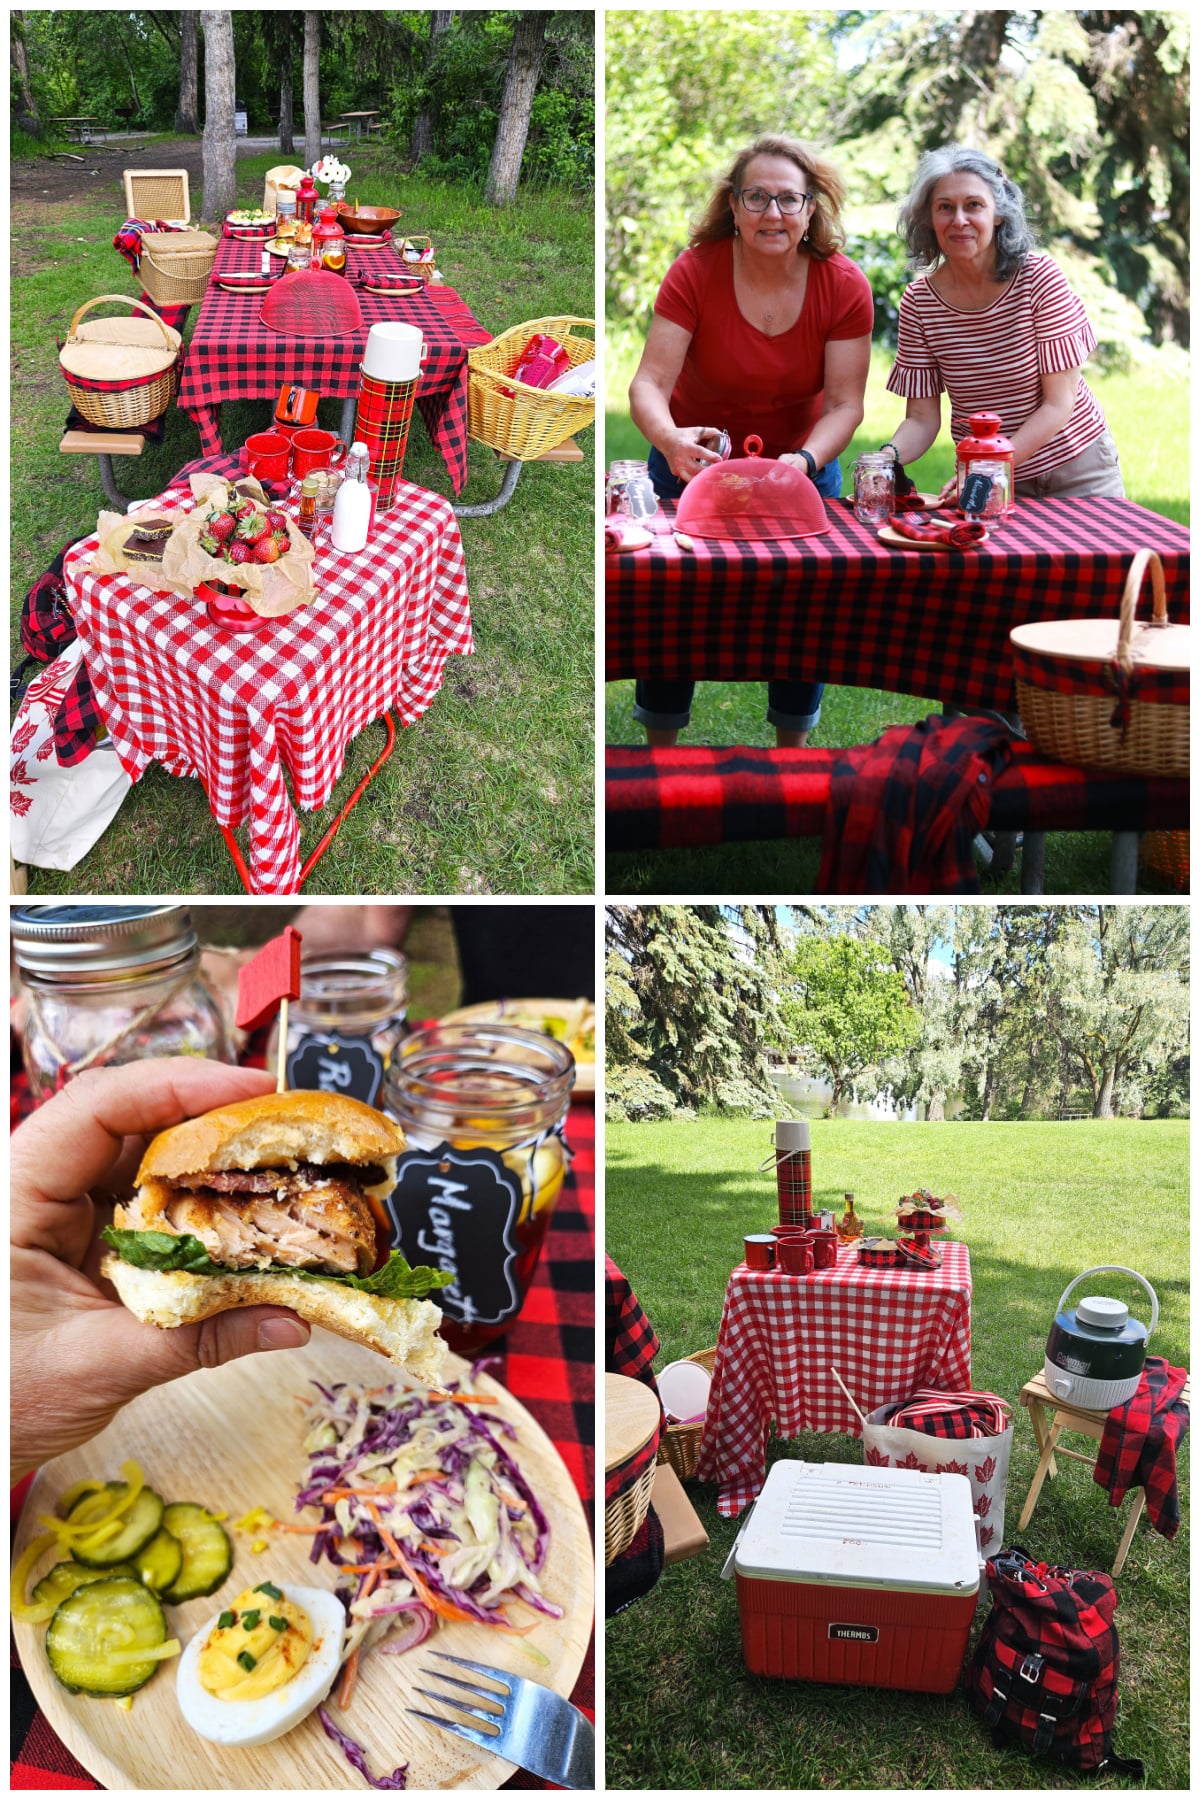
What We Packed
- Buttery Popcorn - we took the easy route and bought a big bag of ready-made popcorn, then packed some of it into a paper bag to bring along, but you could pop your own to bring on the picnic.
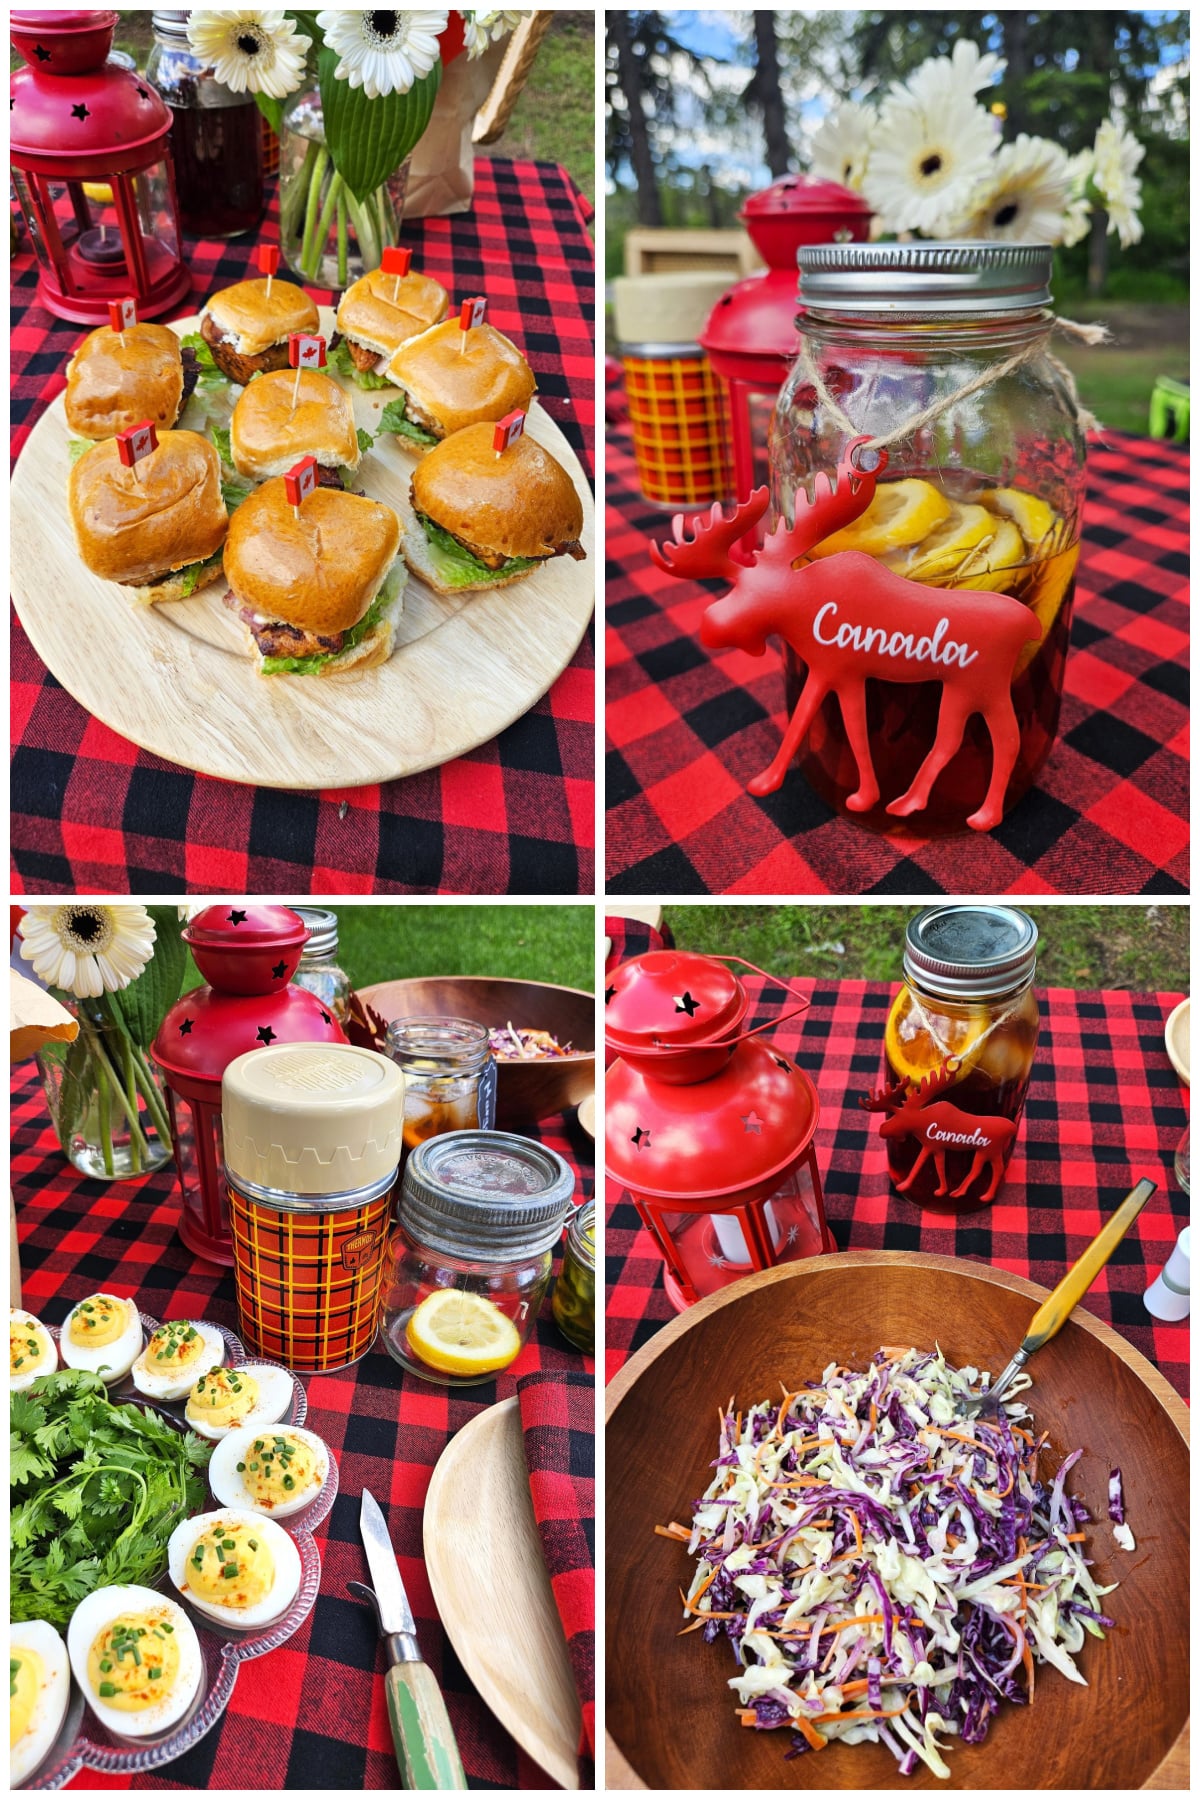
- Salmon and Maple Sliders - Nicoletta and Loreto brought these delightful mini buns. Canada is lucky to have many varieties of beautiful salmon fished from the cold waters off both its coasts. Loreto pan-seared seasoned salmon fillets, then topped them with maple-candied bacon (so Canadian) and fresh lettuce to serve in mini brioche buns for a fantastic slider experience.
- Coleslaw in a creamy dressing - a traditional summer food, this type of sturdy salad packs a flavour punch with delightful texture and makes for a picnic salad that survives transportation very well.
- Deviled Eggs - These nostalgic treats never go out of style and are beloved by many. Hard-boiled eggs are stuffed with the yolks, which are 'deviled' with mayonnaise and mustard - so simple yet so irresistible. Find the classic deviled egg recipe here, with tips for making them easily.
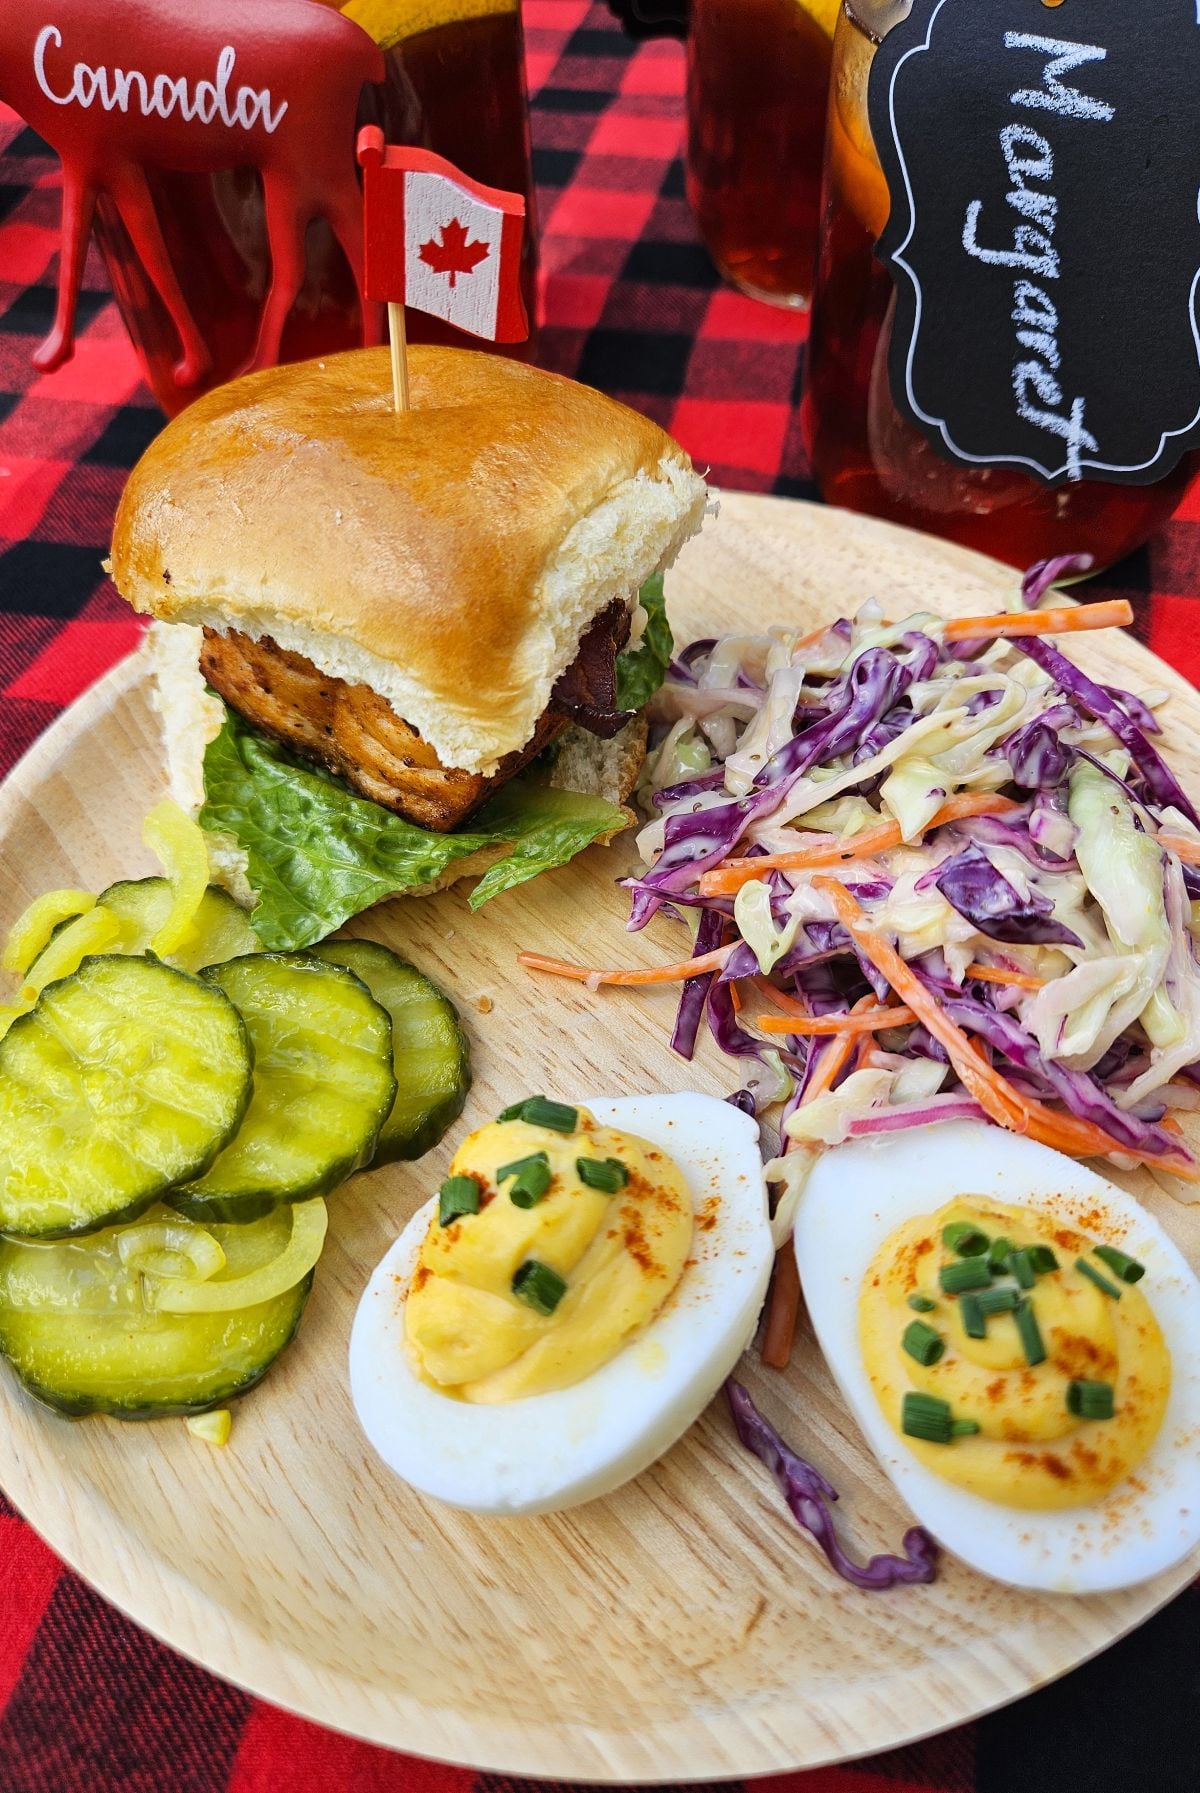
- Bread & Butter Pickles - These refrigerator pickles (no canning needed) are quick and easy to make in your own kitchen. I used English cucumbers and made them a few days ahead. My Bread & Butter Pickle recipe uses half the amount of sugar of traditional recipes and tastes fantastically sweet 'n tangy.
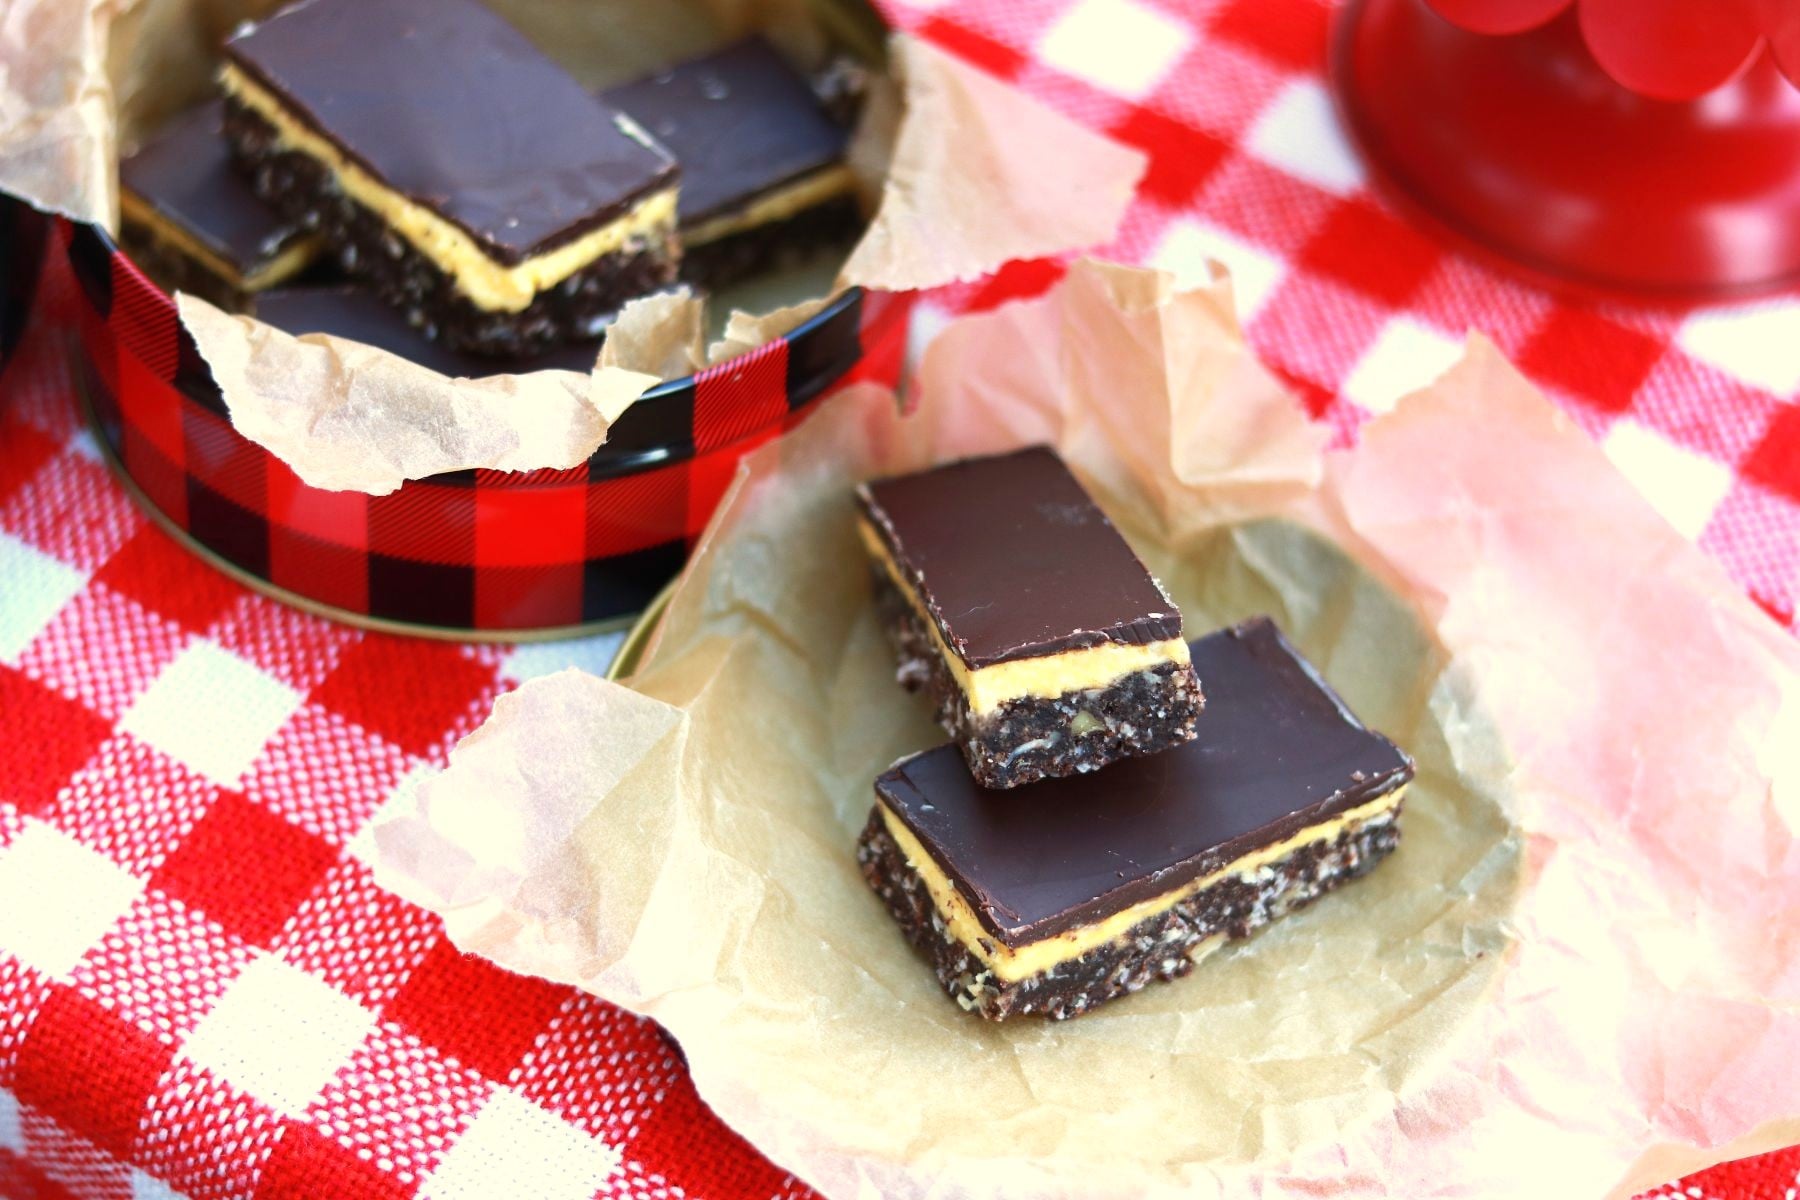
- Nanaimo Bars and Fresh Seasonal Fruit (strawberries are good) - These easy no-bake bars can be made ahead and pack well for transport. Layer them in an airtight container lined with parchment paper or wax paper, and a piece of paper between layers, too. Best kept at cool room temperature, but not chilled completely. Put a frozen gel pack on top of the container if it's a particularly hot day.
- Iced Tea - Make ahead and chill. Steep 6 black tea bags (or 3 tablespoons loose tea) in 4 cups of freshly boiled water for 8 minutes. Remove tea bags (squeeze them well) and add 4 cups cold water. Add ¼ cup of sugar (or more to taste) or other sweetener of choice. Chill and add lemon slices when serving (both can be packed in mason jars).
- Canadiana Coffee - You've heard of Spanish coffee and Irish coffee, well this one's a delicious new coffee experience to add to your repertoire! Fill a cup with hot brewed coffee (bring to the picnic in a thermos bottle). Add coffee cream and maple syrup to taste, then pour in a generous swig of good Canadian rye whisky. Enjoy with a Nanaimo Bar for a quintessential Canadian experience, preferably in the company of a family of Canada geese.
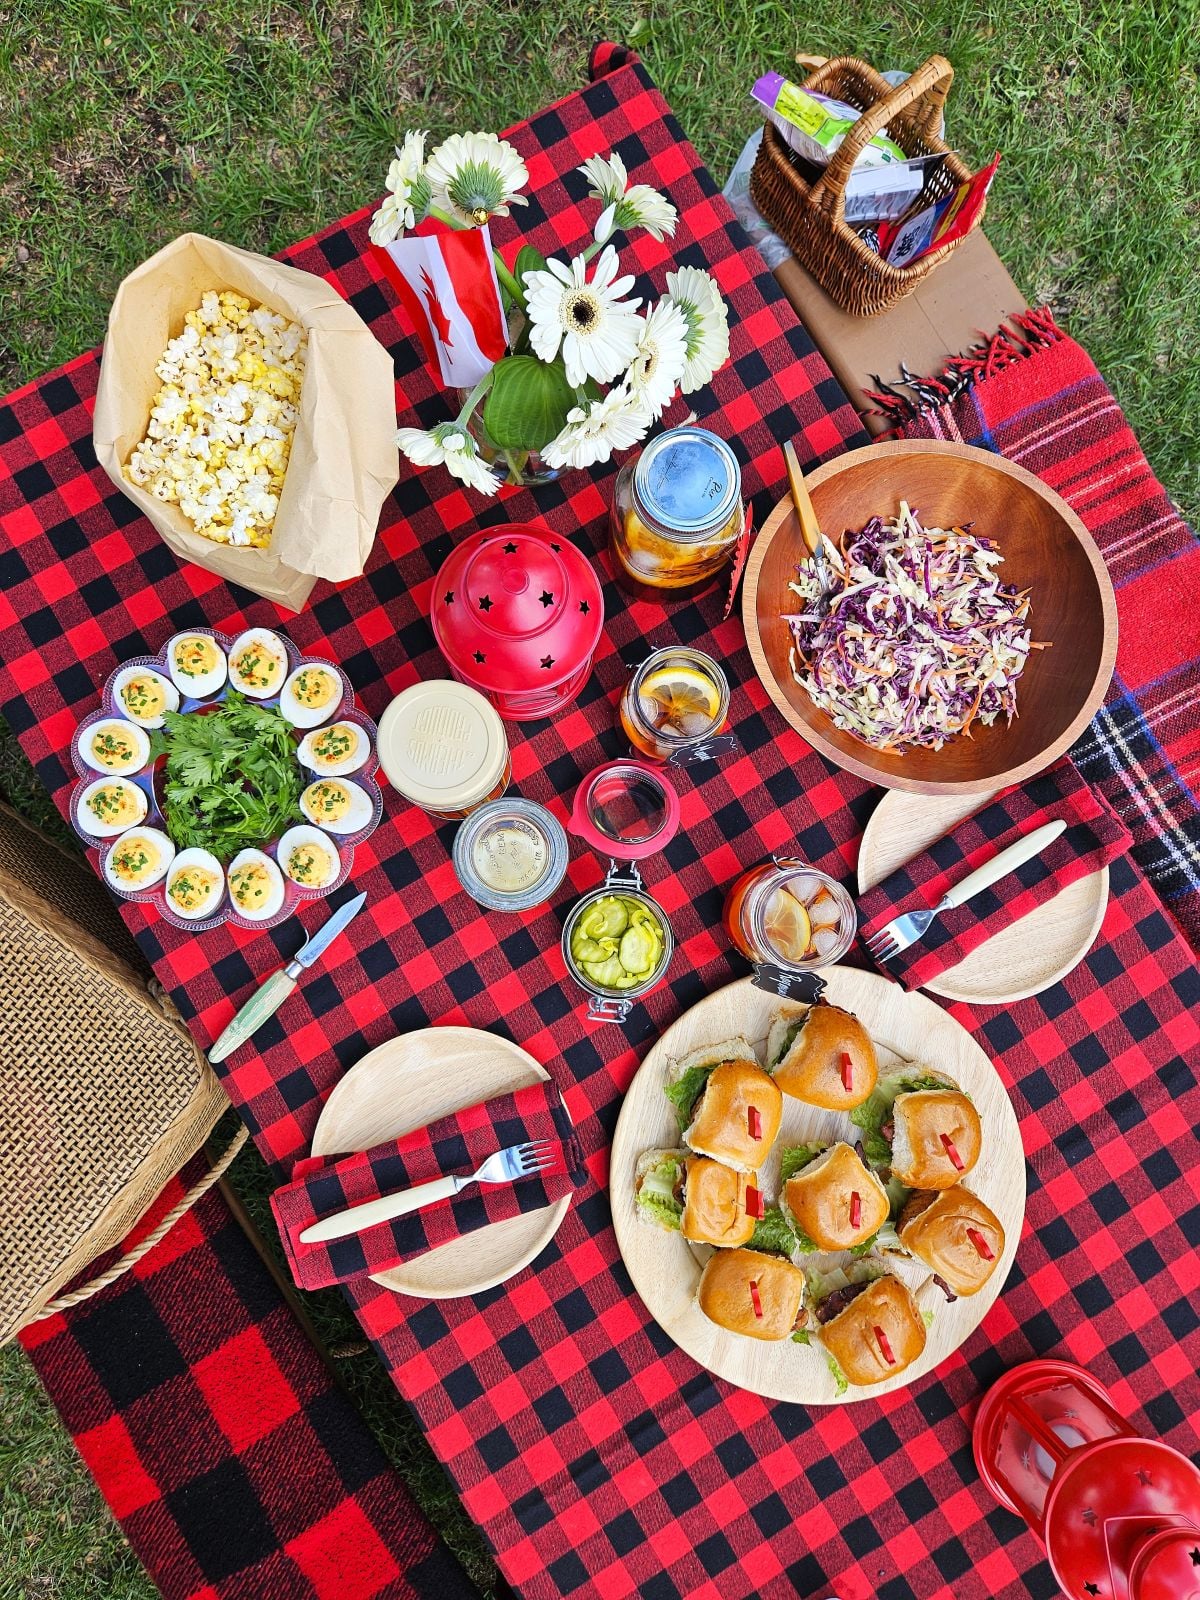
What a wonderful way to spend a lazy afternoon with good friends, delicious food, and happy conversation, all in a beautiful setting. Special memories made.
Nanaimo Bars - A Canadian Icon
I am proud to be a first-generation Canadian - my parents were German immigrants who came to Canada as teenagers in the 1950s. They met in an English language class, married, and I was born in this beautiful country. My first language was German, and as much as I feel connected to my German heritage, I also love to celebrate all that makes me Canadian.
I remember my mom getting together with neighbours and friends in our farming community in southern Alberta to have coffee and share recipes. She was eager to learn how to make the quintessentially Canadian foods that were part of her new adopted culture. So, along with all the delicious German foods that were our daily sustenance, we children grew up with the tasty Canadian dishes that formed the classic foundation of the prairie farm table in the 1960s and '70s.
Butter tarts and Nanaimo bars, jello salads, white bread, and macaroni casseroles - they became dishes we thought of as special treats.

Their Origin
Nanaimo Bars are named after the city of Nanaimo, on Vancouver Island, British Columbia. The first published version of the recipe appeared in the Women’s Auxiliary to the Nanaimo Hospital Cookbook, published in 1952. When Nanaimo Bars were served at Expo 86 in Vancouver and the recipe was published in the Expo cookbook, they gained popularity nationwide. These sweet little bars have since crossed borders and become known and enjoyed over other parts of North America.
Nanaimo Bars - But Much Less Sweet
I've always loved Nanaimo Bars - those 3 distinct layers that meld into a rich and decadent chocolatey treat - but the one thing that held me back from enjoying them often was how tooth-achingly sweet many versions are. As much as they tempted me, I could never eat more than a few bites (especially from any commercially-made ones). So I've adapted the recipe to make Nanaimo bars that are less sweet than the traditional ones. We love them this way!
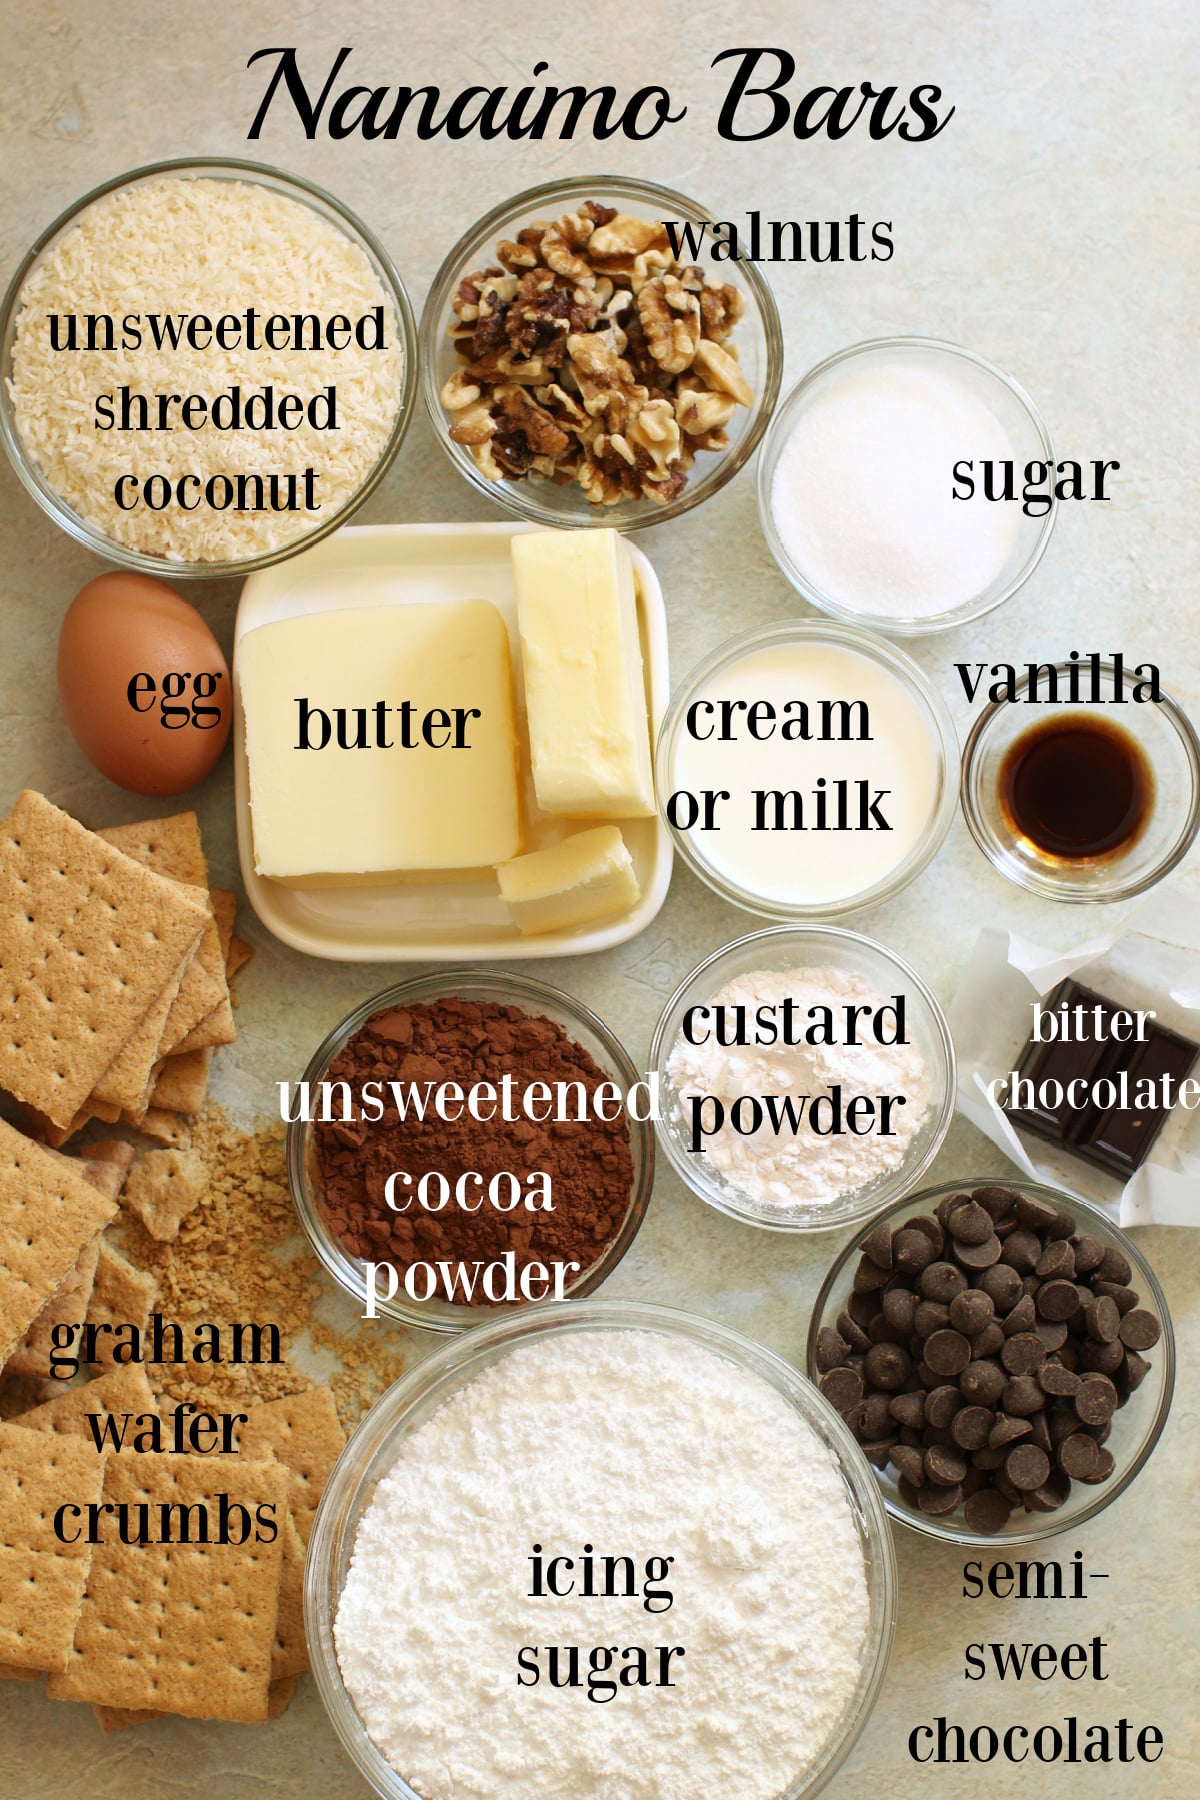
Jump to RecipeWhat You'll Need to Make Them
How to Make Nanaimo Bars
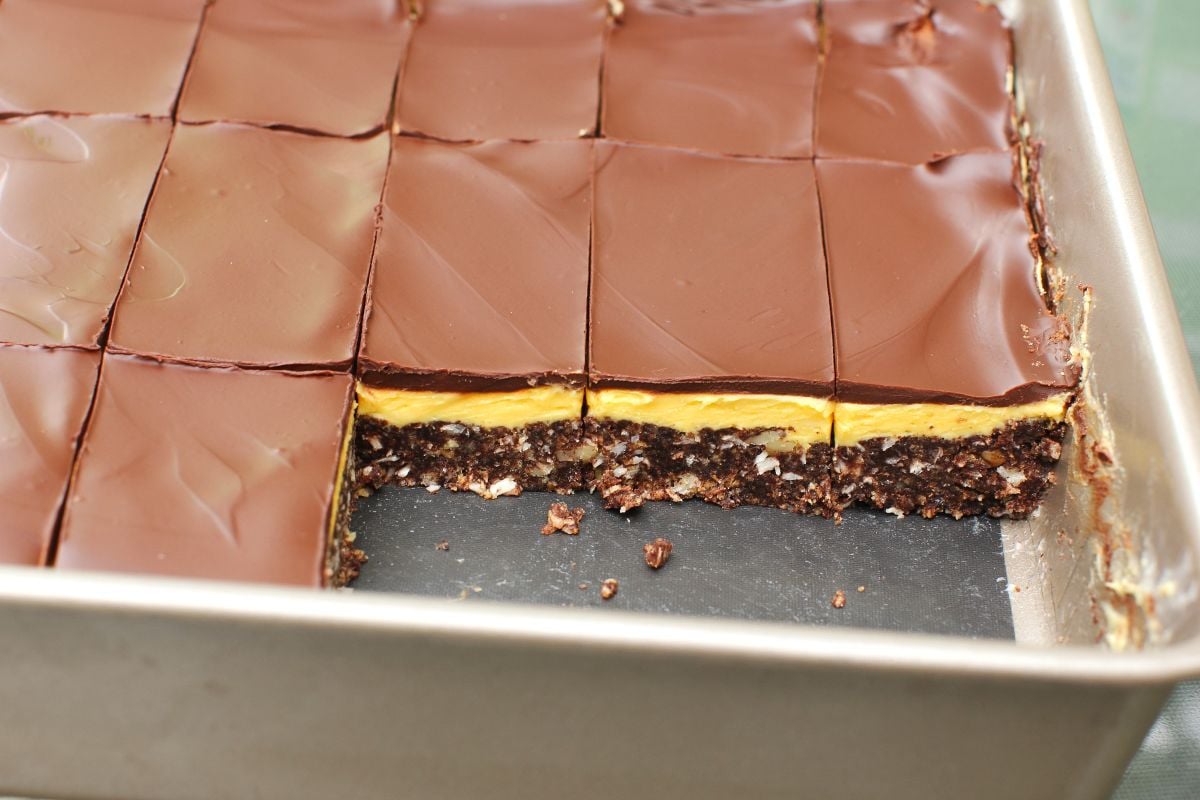
These no-bake bars come together in 3 easy layers:
- 1. The deliciously nutty chocolate biscuit base, which is heated in a double boiler, then combined with cookie crumbs, coconut, and nuts
- 2. The vanilla custard icing (simply beat it all together)
- 3. The dark, fudgy, chocolate glaze layer (heated in a microwave or double boiler)
Make the base layer: Make the graham wafer crumbs by whizzing broken graham wafers (or other cookies) in a food processor or mini-processor (in batches), or by putting them in a plastic bag and bashing them with a rolling pin or a small heavy-bottomed saucepan.
In a glass or metal bowl, add the butter, cocoa powder, sugar, egg, and vanilla. Then choose a saucepan just big enough that you can set the bowl into it so that it's a couple inches from the bottom. Add about 1 inch of water to the pot and get it simmering. Then set the bowl into the pot and heat the ingredients, stirrring constantly, until they are melted and combined.
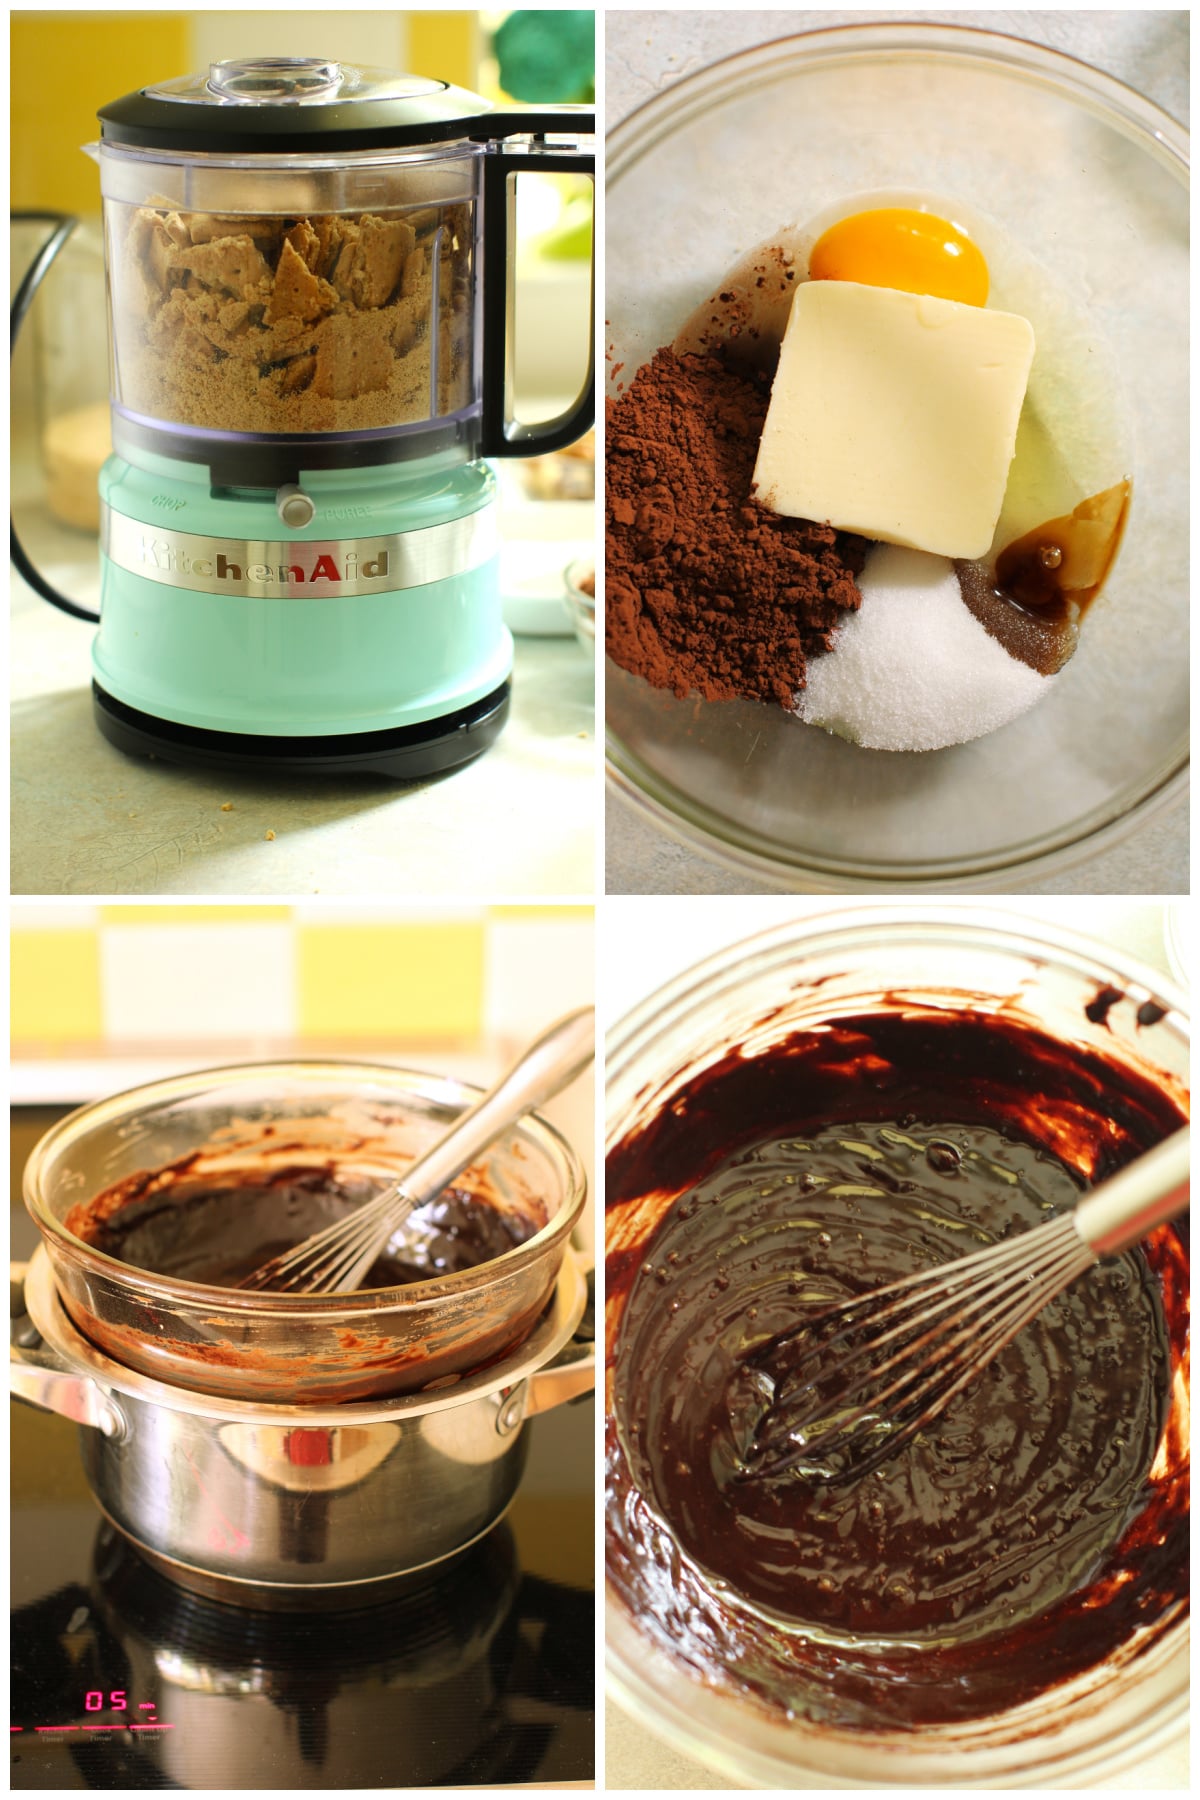
Switch to a whisk and keep cooking until the mixture is thickened and glossy and hot to the touch. This will take about 5 minutes from when you set the bowl into the pot (or until the chocolate custard reaches 160°F or 71°C on a thermometer).
Remove it from the heat and stir in the graham wafer crumbs, coconut, and walnuts. Stir until they are all coated with the chocolate custard - or mix it with your hands if you lose patience with the spoon.
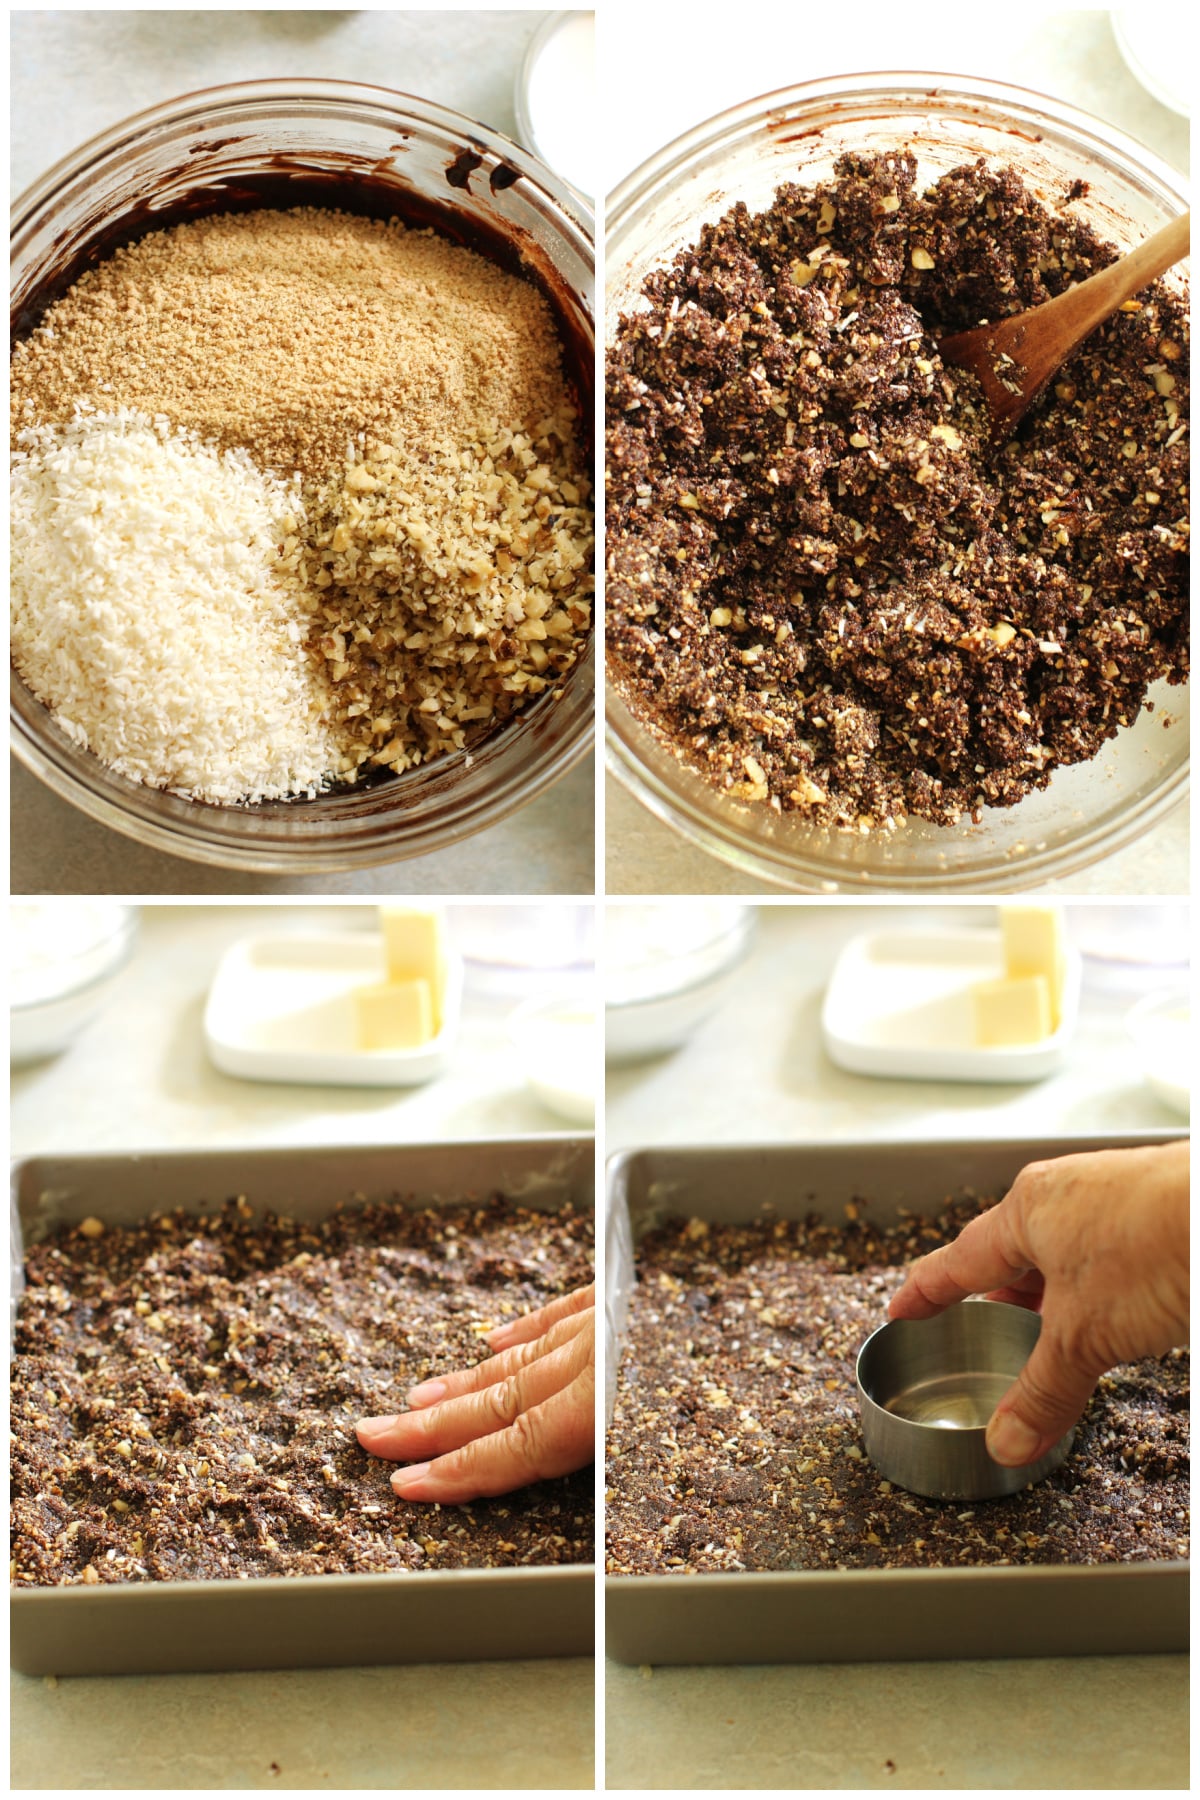
Now pack the stiff mixture into a greased pan and press it flat with your hands, and then press on it with the bottom of a measuring cup or smooth-bottomed glass so the top is nice and even.
For the next two layers, just whip together the butter, icing sugar, custard powder, and a bit of cream (or milk). Spread it evenly over the base layer. Then melt some semi-sweet chocolate with a tablespoon of butter and some extra unsweetened chocolate to make it especially deep, dark, and bitter (to really balance the sweetness), and smooth that over the icing.
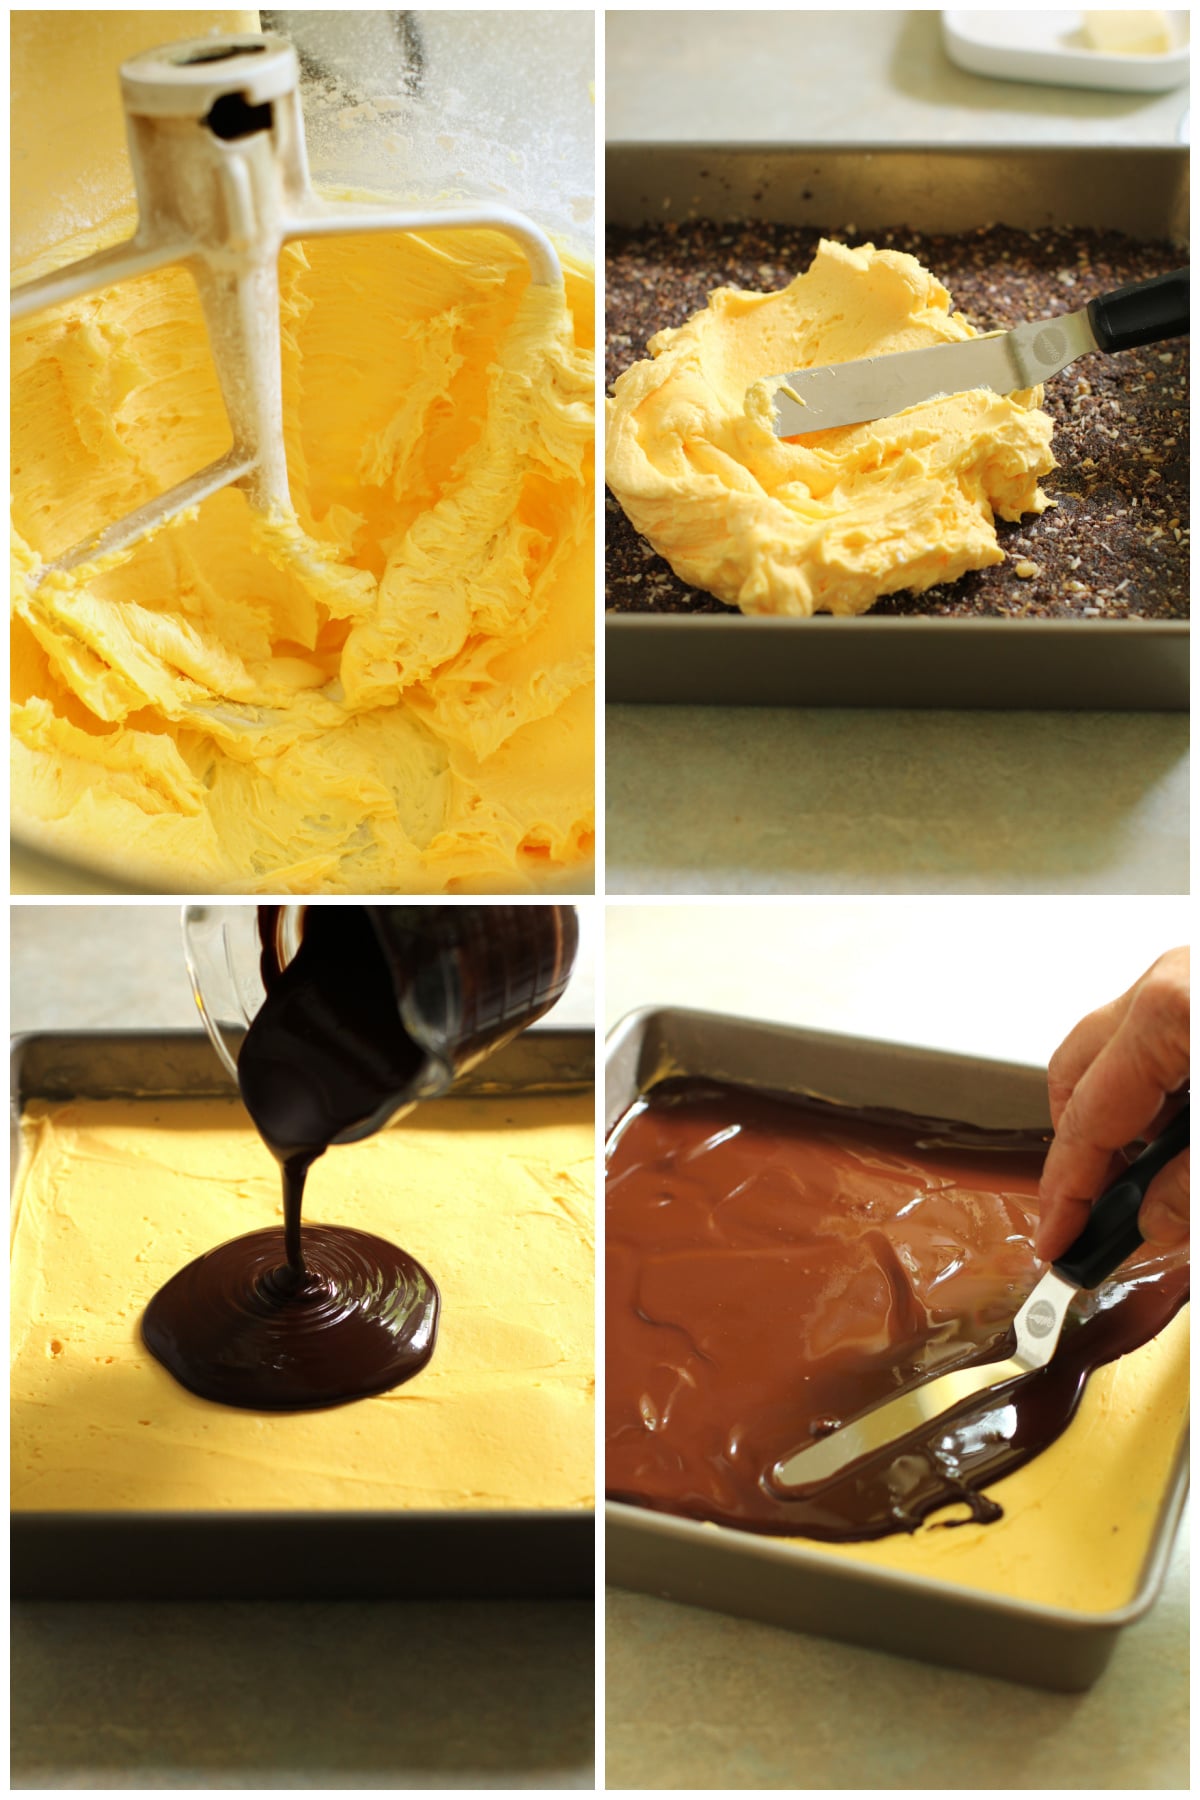
Let it cool, and cut it into bars or squares. They're ready to eat now or pack for your picnic.
Yum. Canadian sweetness.
More Picnic Inspiration
We LOVE having picnics. Check out Nicoletta and Loreto's photos of our Canadiana picnic and their recipe for the Salmon Sliders on their blog.
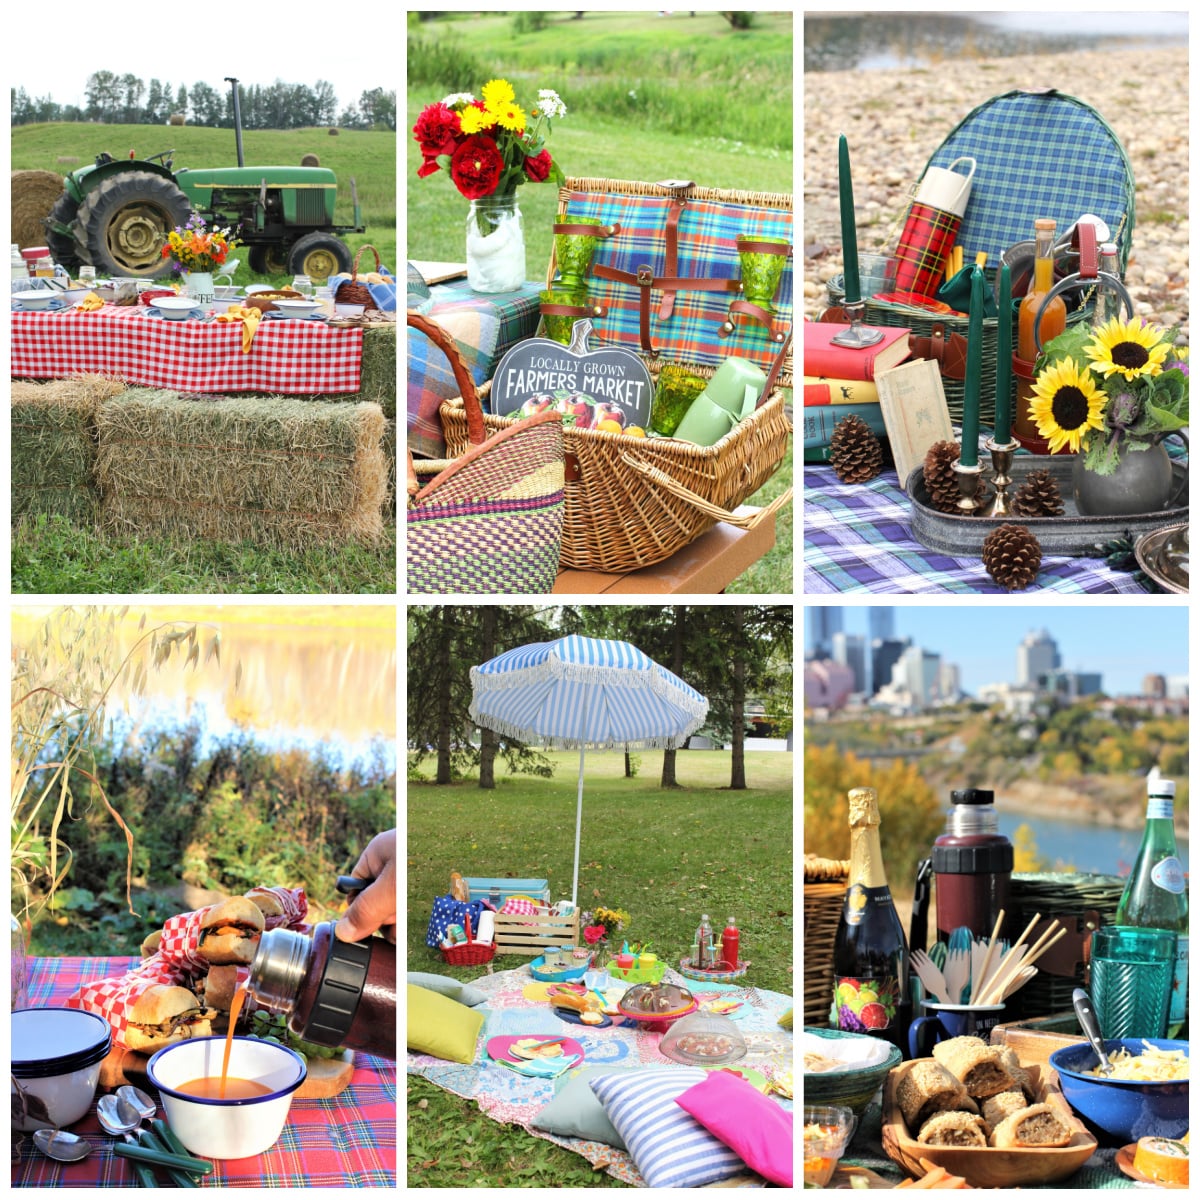
Looking for inspiration? Here are a few of our past themed picnics, with photos and the delicious recipes.
- Fresh Lemonade and a Country Farm Picnic
- Zucchini Frittata Loaf and a Farmers' Market Picnic
- Scotch Eggs and a Scottish Picnic at the River
- Homemade Tomato Soup and a Late Fall Picnic by the Lake
- Lemon Mousse and a Fun & Games Picnic
- Gluten-Free Sausage Rolls and a Glorious Autumn Picnic
Want to receive new Kitchen Frau recipes directly to your email as soon as they're posted? Sign up here and you’ll get bits of news updates on what's happening in my kitchen and garden, plus a handy and useful kitchen tip along with each recipe, too. (No spam ever.)
If you like my recipes, follow me on Instagram, Pinterest, and Facebook. You’d make my day. 😊
Guten Appetit!
Nanaimo Bars
Ingredients
Base:
- ½ cup (115 g) salted butter
- ¼ teaspoon fine sea salt (increase salt to ½ teaspoon if using unsalted butter)
- 5 tablespoons (30 g) unsweetened cocoa powder
- 3 tablespoons granulated sugar
- 1 teaspoon pure vanilla extract
- 1 large egg
- 2 cups (225 g) graham wafer crumbs (from about 30 graham wafer squares 2¼"x 2½" each/5.5 x 6 cm) Use gluten-free graham wafers or other crisp gluten-free cookies, crushed, for a gluten-free version.
- 1 cup (90 g) unsweetened medium-shredded coconut
- ½ cup (50 g) finely chopped walnuts
Icing:
- ½ cup (115 g) salted butter, softened
- 2 tablespoons (30 ml) heavy cream, room temperature (or use milk)
- 2½ tablespoons custard powder (like Bird's®, or substitution, see Notes)
- 1½ cups (180 g) icing sugar (powdered sugar/confectioner's sugar)
Glaze:
- 4 oz. (115 g/4 squares) semi-sweet chocolate (or a scant ⅔ cup semi-sweet chocolate chips)
- 1 oz. (28 g/1 square) unsweetened chocolate
- 1 tablespoon butter
Instructions
To make the base:
- Grease a 9x9-inch square pan (22.5x22.5cm) liberally with butter. Line the bottom with a square of parchment paper cut to fit.
- Put butter, cocoa powder, sugar, vanilla, salt, and egg into a glass or metal bowl and set on top of saucepan of simmering water to make a double boiler. Cook, whisking constantly and scraping down the sides of the bowl often, until the mixture is hot and forms a thick custard. This will take 5-6 minutes (or until it reaches about 160℉/71℃ on a thermometer).
- Remove from the heat and stir in the graham wafer crumbs, coconut, and walnuts until everything is evenly coated in chocolate. The mixture will be thick - it may be easier to mix it with your hands than a spoon.
- Pack the mixture into the greased baking pan and press it down evenly, using your hands or the smooth bottom of a measuring cup or glass. Allow the base to cool completely before adding the icing.
Make the icing:
- Cream the butter, cream, custard powder, and icing sugar with an electric mixer or vigorously by hand. Use low speed until all the ingredients are combined, then increase the speed to medium-high and beat the icing until it is light in colour and fluffy (2-3 minutes).
- Spread the icing evenly over the cooled chocolate/wafer base in the pan, smoothing the top evenly. Chill for 10 minutes (but no longer) while you are making the glaze.
Make the glaze:
- Melt together the semi-sweet chocolate, unsweetened chocolate, and butter in the microwave or in a double boiler. Stir until smooth, and let cool for 5 minutes.
- Pour over the icing layer and smooth the top, making sure to bring right to the edge of the pan all the way around. Let it set at room temperature or in the refrigerator.
- Cut into 18 bars (3 rows of 6 bars). If the pan of bars is chilled, let it come to room temperature for at least 30 minutes before cutting, or the chocolate glaze layer will crack and shatter while cutting.
Nicoletta De Angelis
These Nanaimo bars were the perfect ending to our delicious and beautiful picnic! They were not overly sugary, which I appreciated a lot. I was not a fan of this dessert, now you won me over!
Margaret
Oh, I love to hear that, Nicoletta! I think their flavour is even better when they're less sweet, too. It was a magical picnic - such fun to plan together, and even more fun to enjoy! Can't wait for the next one❤️
Elsa
I am so excited to try this recipe, and serve it to our European visitors .
Thank you Margaret !
Your picnic looks so beautiful and delicious!
Happy Canada Day !
Margaret
Thank you SO much, Elsa. Your guests will get a little taste of Canada! 😍 It really was a fun picnic, and turned out to be a beautiful day!!!