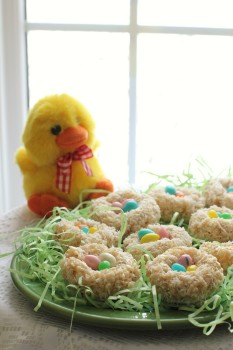
These adorable Rice Krispie Easter Egg Nests were dropped off by the Easter Bunny! Aren't they just the sweetest little treats? (Skip to recipe.)

Cooking with Meredith
Shhhh. Can you hear that rustling? Stand really still so you don't scare him. I think it must be the Easter Bunny, and I think he's hiding something. I'll just tiptoe over there to see if I can peek at him.
Yup! I believe that was him - I just saw a fluffy little tail whisk around the corner!
Oh my, look what he left us!
These sweet little nests!
Meredith and I helped the Easter Bunny prepare these little crispy rice nests for Easter. We know he's so busy painting eggs he wouldn't have had time to get them all done by himself.

We sneaked a little taste and they were so yummy. We hope you like them too!
HAPPY EASTER
Kitchen Frau Notes: These nests are best to make with two people, since you have to work fast to get them formed before the mixture cools and the marshmallow sets.
Spritzing the outside of the nests with a light mist of water helps keep them sticky enough for the coconut to stick. You can buy spray bottles at the dollar store, or use a clean empty spray bottle from a non-toxic cleaning product.
Rice Krispie Easter Egg Nests
gluten-free option, dairy-free option
- ¼ cup (60gms) butter or coconut oil, plus a bit extra
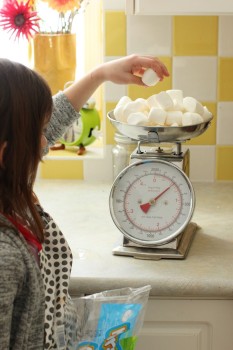
- 250 gms (9oz.) marshmallows (6 cups mini marshmallows or 40 regular-sized ones)
- 1 teaspoon vanilla
- 6 cups crispy rice cereal (gluten free if necessary)
- ½ cup (40gms) shredded coconut
- 36 jelly beans or mini candy-coated chocolate eggs (check for gluten or dairy)
- a spray bottle filled with water
Before you start, lay out a sheet of wax paper or parchment paper on your work surface. Have a spray bottle of water ready so you can mist the nests so the coconut sticks to them.
Measure out the crispy rice cereal in a large bowl. Place the coconut in a smaller bowl next to the wax paper.
In a large saucepan set over medium heat, melt the butter. Add the marshmallows and stir constantly just until they are melted and combined with the butter. Remove the saucepan from the heat and stir in the vanilla.
Pour the melted marshmallow mixture over the crispy rice in the bowl, scraping out the saucepan with a silicone spatula. You'll have to work quickly so the marshmallow doesn't set. Use a long-handled wooden spoon to stir the crispy rice and marshmallow mixture together until it is all coated.
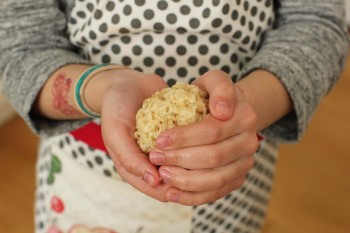
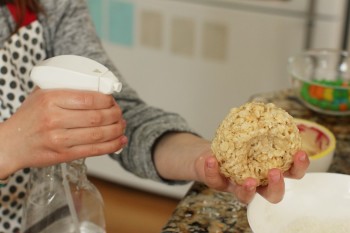
Take a pea sized amount of butter or coconut oil and rub it between your palms to grease them. Take a large handful of the gooey rice mixture (about ½ cupful) and pack it firmly into a ball (like you're packing a snowball).
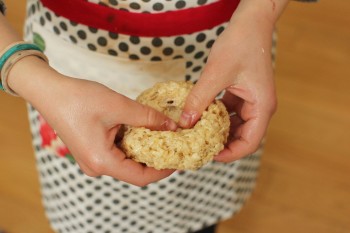
Then press both your thumbs into the center of the ball to make an indentation. Pinch around the sides of the 'nest' to make a ridge all the way around.
Quickly spray the whole surface of the 'nest' with a misting of water - this will help make it sticky.
Roll the nest in the coconut, sprinkling some into the indentation and shaking out the excess.
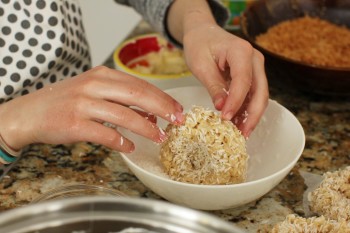
Gently press back together any parts of the nest that came apart a bit. Set the nest onto the waxed paper.
Quickly continue making more nests until you have used all the crispy rice mixture, regreasing your hands with more butter whenever the nests start to stick to your fingers. You should have twelve nests.
Once they are all done, you can fill the nests with 3 jelly bean eggs in the center of each one.
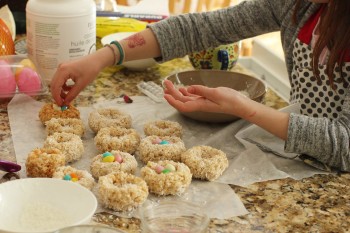
Let them cool until they harden.
Makes 12 nests.
Guten Appetit!
Want to receive new Kitchen Frau recipes directly to your email? Sign up here and you’ll get a handy and useful kitchen tip along with each recipe, too. (No spam ever.)
If you like my recipes, follow me on Instagram, Pinterest, Twitter, and Facebook. You’d make my day!
For more fun kitchen projects to make with kids, see the 'Cooking With Kids' series.
You might also like:
Cooking with Kids: Surprise Jellied Easter Eggs
Cooking with Kids: Raspberry Honey Marshmallows
Choco-Crisps (Oaty, Chocolate Rice Krispie Cookies)
Chocolate Truffle Cake Pops - with a Surprising Secret Ingredient

Leave a Reply